Z.One Module Configuration
Z.One - Mega Menu
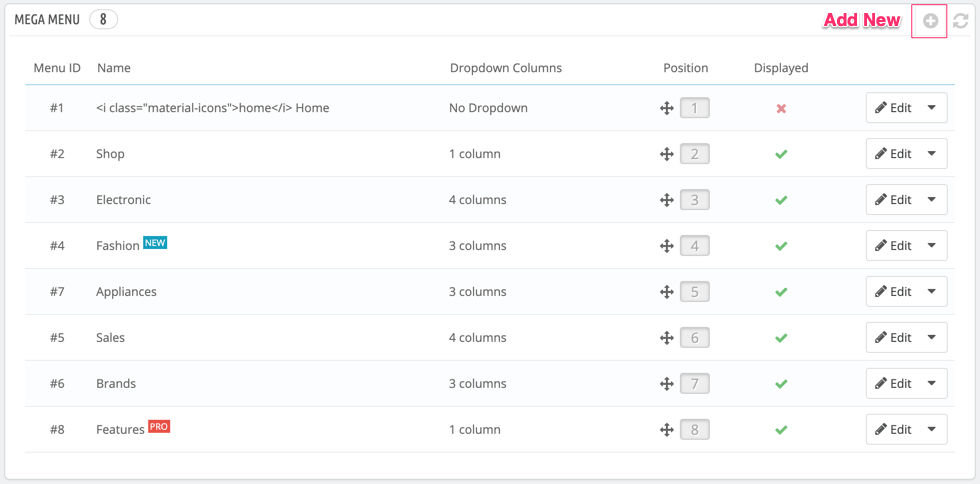
1 Add new MENU ITEM
- In MENU LIST section, click on ADD NEW button to open the New Menu page
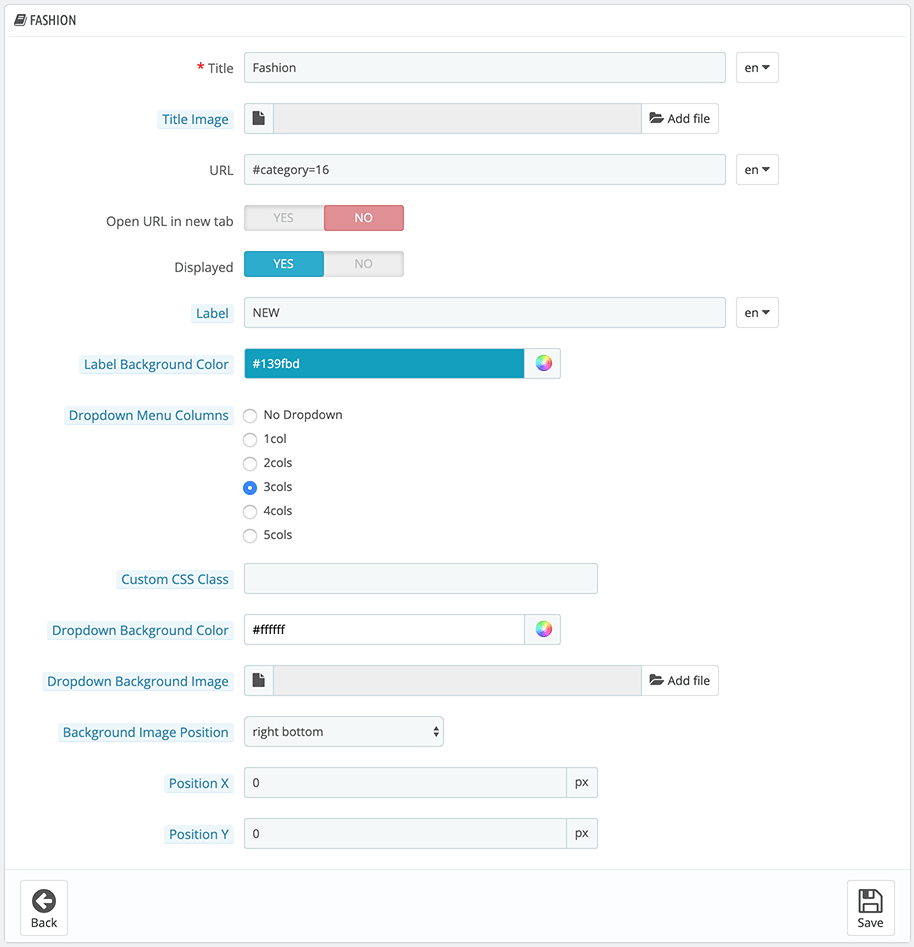
- Title
Enter menu title
Please check Syntax in Menu Title here - Title Image
Upload an image for menu title - URL
Assign a link to this menu
Please check Syntax in Menu URL here - Open URL in new tab
Open Link in a new tab by URL - Displayed
Enable / Disable this menu - Label + Label Background Color
Add a small label above the menu title - Dropdown Menu Columns
We need to set the column number of the dropdown. Maximum is 5 columns.
In desktop version, the width of a column is 234px, the width of 5 columns is 1170px. - Custom CSS Class
Define a class name for this menu - Dropdown Background Color + Dropdown Background Image + Background Image Position + Position X + Position Y
You can set a background for each menu.
2 Add dropdown content for Menu
- In DROPDOWN CONTENTS section, click on ADD NEW button to open New Dropdown Content page
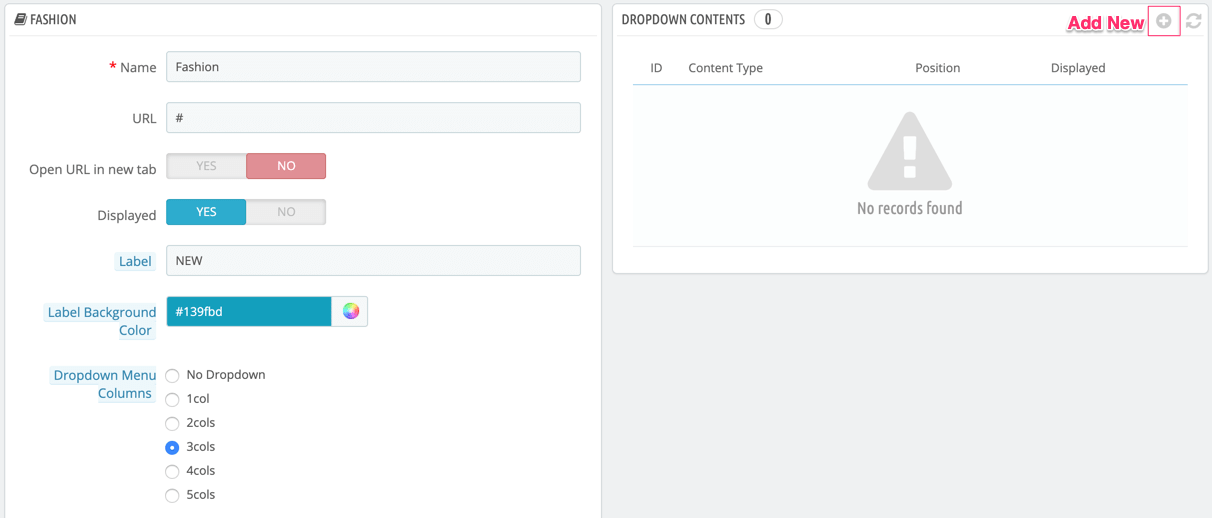
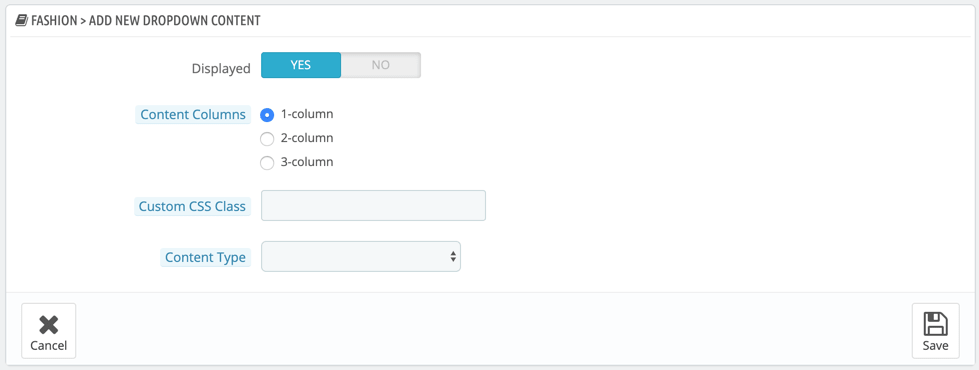
- Displayed
Enable / Disable this menu - Content Columns
The number of columns(width) of dropdown content. Maximum value is Dropdown Menu Columns option - Custom CSS Class
Define a class name for this content - Content Type
We have 4 content types: Category, Product, Custom HTML, Manufacturer
3 Dropdown Content Type
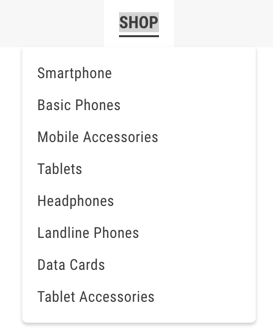
- Category
Select the categories you want to display in this dropdown content.
It will display the "selected categories | category image | category icon | sub-categories" in the front-end.
Example configuration: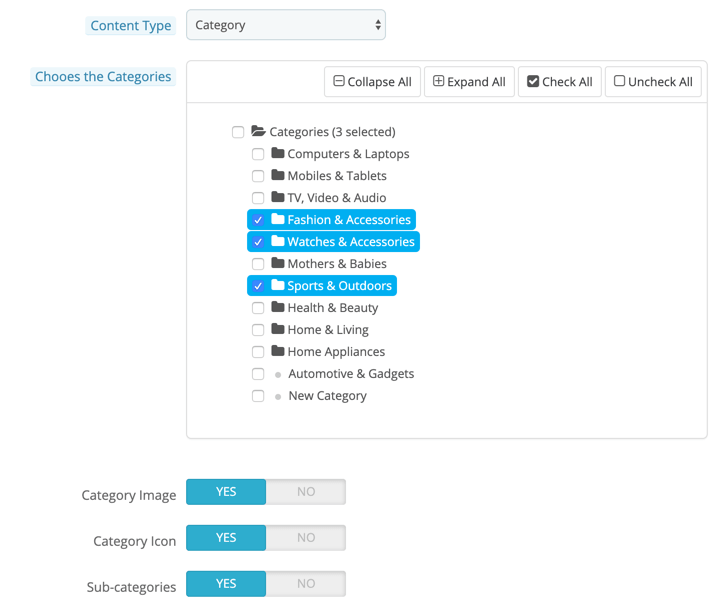
Result: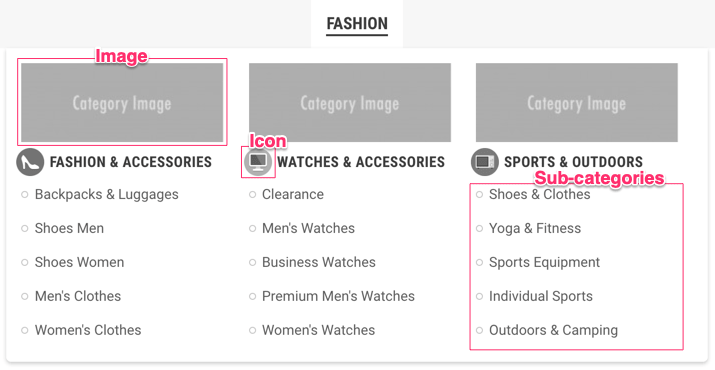
- Product
Select the products from autocomplete list
It will display the selected products(thumbnail, name and price) in the front-end.
Example configuration: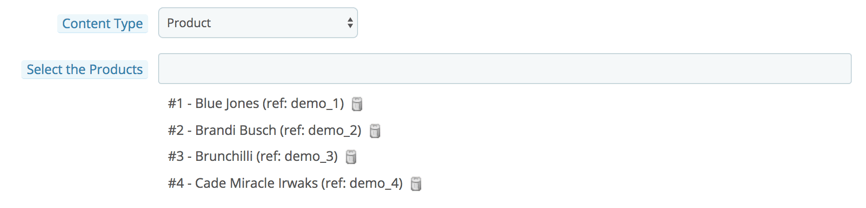
Result: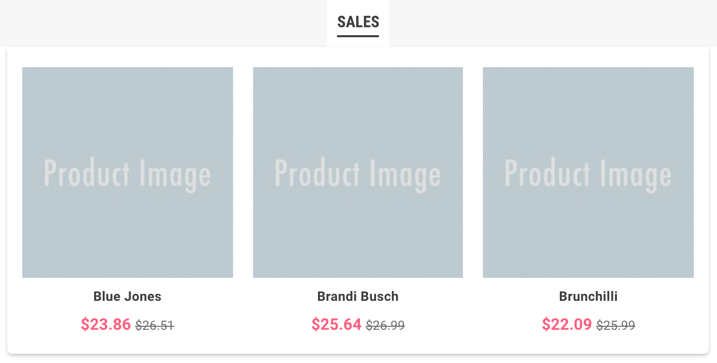
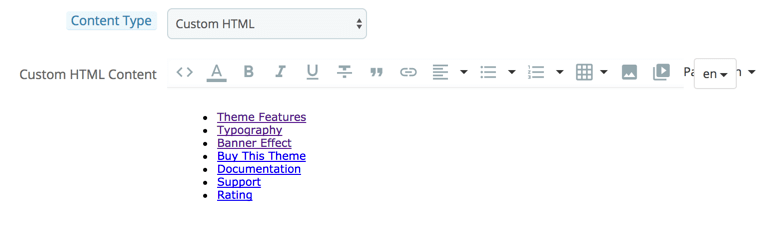
- Custom HTML
You can add any content (image, HTML, links) in this option
Example configuration:<ul class="linklist mb-0"> <li><a href="#">Theme Features</a></li> <li><a href="#">Typography</a></li> <li><a href="#">Banner Effect</a></li> <li><a href="#">Buy This Theme</a></li> <li><a href="#">Documentation</a></li> <li><a href="#">Support</a></li> <li><a href="#">Rating</a></li> </ul>
Result: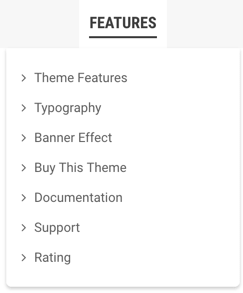
- Manufacturer
Select the manufacturers you want to display in this dropdown content.
It will display the manufacturer logo in the front-end.
Example configuration: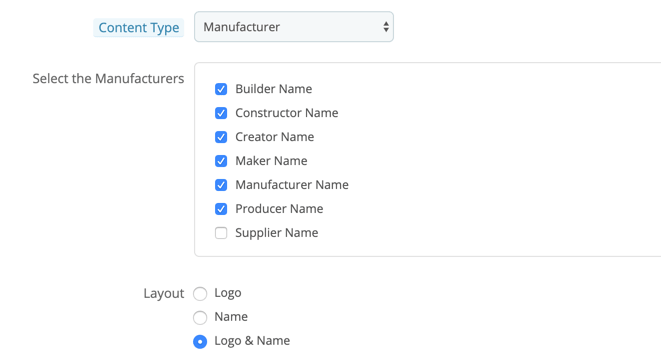
Result: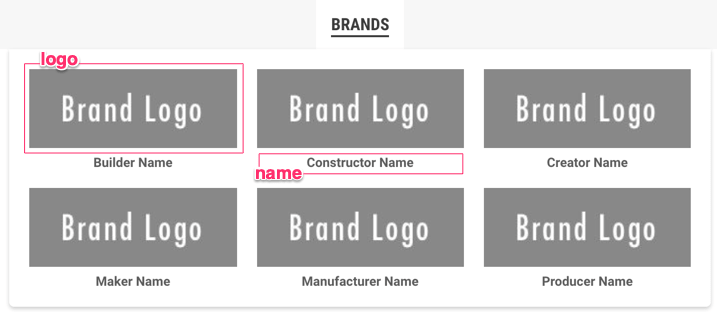
4 Syntax in Menu Title
- #category=id_category
With this syntax, we can get the category name
Example: #category=3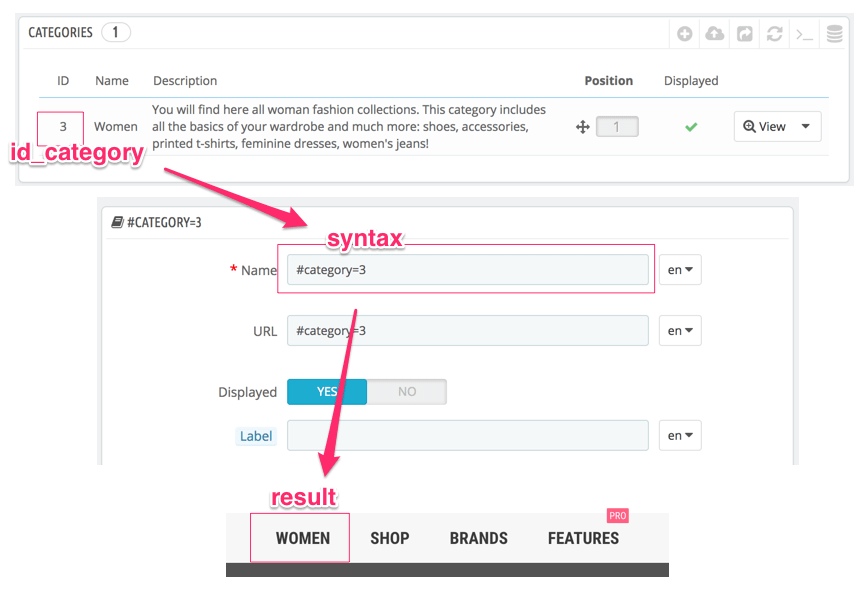
- #page=id_page
With this syntax, we can get the CMS page name
Example: #page=4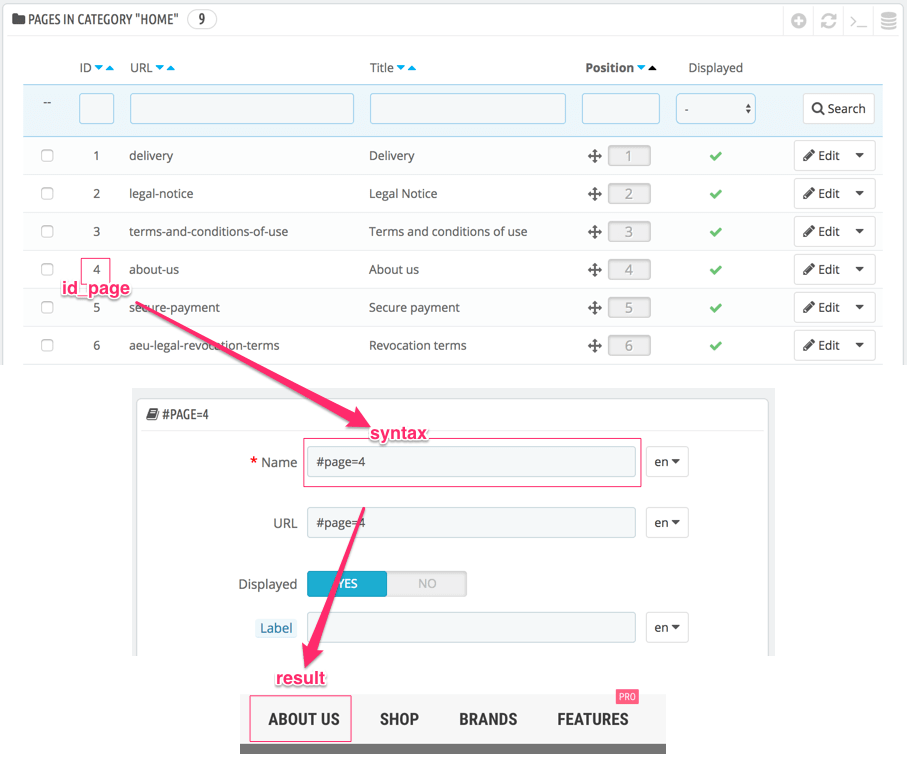
5 Syntax in Menu URL
- #category=id_category
With this syntax, we can get the category URL
Example: #category=3
Result: http://your_site/category/3-women - #page=id_page
With this syntax, we can load the CMS page URL
Example: #page=4
Result: http://your_site/content/4-about-us - #page=page_name
With this syntax, we can load the default page of PrestaShop
Values of page_name:- home
- prices-drop
- new-products
- best-sales
- contact
- sitemap
- stores
- authentication
- my-account
- manufacturer
- supplier
Result: http://your_site/new-products
6 Custom CSS Class
You can add a specific class name for the dropdown content
Predefined class name:
- category-horizontally
By default, the category will be displayed vertically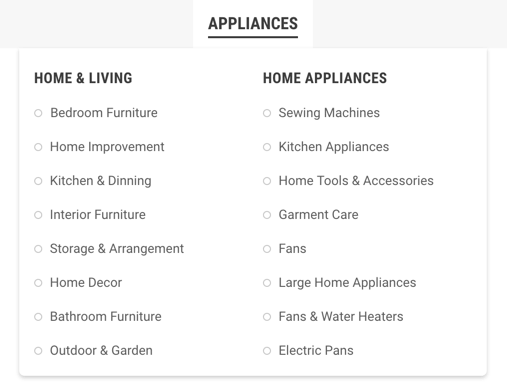
When you use category-horizontally class name, the category will be displayed horizontally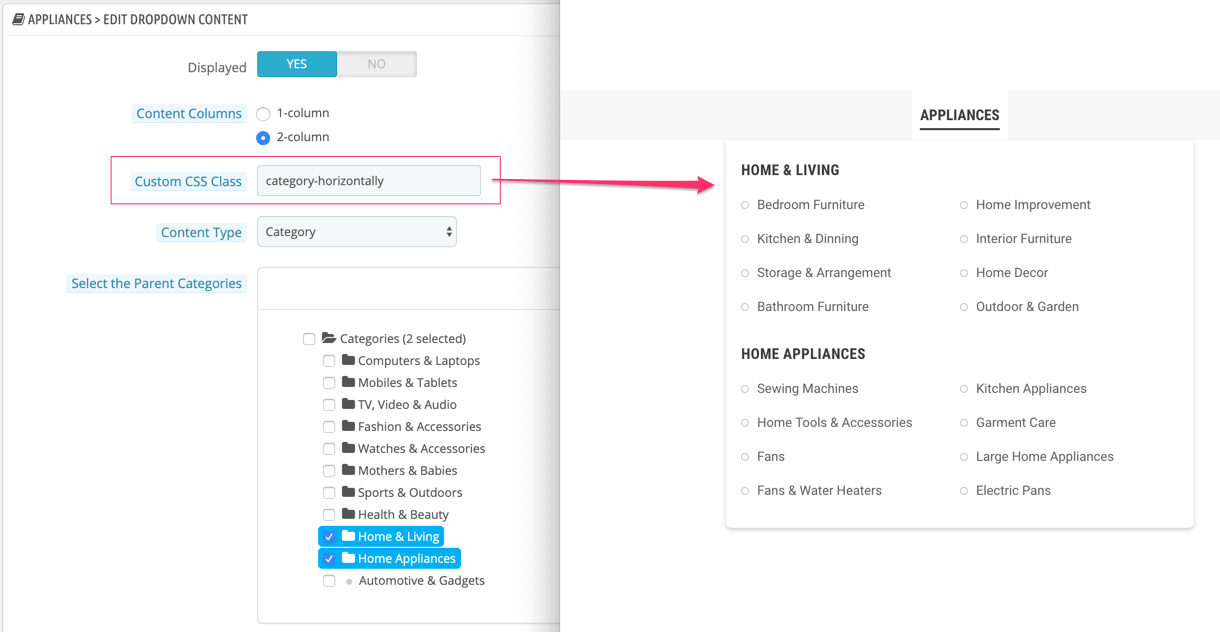
- small-category-title